Showing posts with label acrylic painting techniques. Show all posts

Thursday, September 19, 2013

Studio Update.

It's been business as usual here in my little corner studio since our return from Vegas last week.


Here's a sneak peek at the floor canvas I'm working on right now. My inspiration, those fabulous 'modern art' carpets that I see in all the home decor magazines. They are way out of my budget so a perfect excuse for a DIY.


To get the very textured paint effect that I want, I applied some acrylic modeling paste very lightly and haphazardly all over the canvas.


I've used seven different Benjamin Moore paints and layered color over color. I had an idea of how I wanted the finished canvas to look, but as I painted intuition took over and I just went with the flow. If an area looked too dark, I went over it with a lighter color. If an area started to look to neat, I splattered and flicked the paint.

Four of the paints I purchased at my local paint store and the rest was graciously provided by Sharon Grech and Benjamin Moore.


Here are some of the tools I used. I especially like painting this textured effect with a brayer instead of a brush.


The painting is now finished and I'm really pleased with it. All that's left to do is to turn under the edges and give it a couple of coats of Benjamin Moore's Stays Clear to make it really durable. 

The reveal??  You'll just have to wait and see the finished floor canvas when our segment airs on Cityline later this year.

Tuesday, September 3, 2013

Back to Work.


The weather is perfect today to start a new project. Humidity is gone and there's a great breeze happening so I can paint with the balcony door and windows wide open. This huge piece of canvas is for the Cityline segment that I'm working on. You can read how my 'dream project' came to reality here and here. When complete, it will be a one of a kind floor cloth.

In looking at this photo I kind of feel that I've bitten off more than I can chew at this point. The piece of canvas I'm working with is quite large, about 6'x7'. So far I've only used this painting technique on stretched canvas that was 4'x5'.

As the canvas is much larger and un-stretched I'll have to paint it on the floor. It will be a bit of a challenge painting it this way but I'm definitely up for that. I don't want to share too much of my process as I want to save it for the big reveal. Stay tuned.

Wednesday, August 22, 2012

Color and Paint.


Last weeks finished DIY is still hanging in the master bedroom and I couldn't be happier. The colors are so soothing and 'beachy'. Thank you to everyone that commented, tweeted and sent emails. I still have a carpet (floor cloth) to paint but I think I'll be using darker colors. Maybe jewel tones as they would be more suited to the long fall and winter months.

They say diamonds are a girls best friend? Not so at least for this girl. A Benjamin Moore fan deck would do very nicely thank you.


The week so far has been a mad house. I've been enjoying long days of painting in my tiny little corner space that is my studio. I'm working on a few projects that I can't share until I get the final word from my publisher, but I can tell you that they are fun, fresh and full of color.

Note to self-when painting with a breyer and red paint, be sure to use a drop cloth and have a wet rag handy. Otherwise the place starts to look like a crime scene very fast. Ciao for now. :-)


Thursday, July 21, 2011

The Week as Art. The Process.

I was so excited when I was asked by Create Mixed Media to create "the week as art" this week. As a fine artist who loves to dabble in mixed media this was a great opportunity to share my vision and process. I decided to make seven little assemblages using a wide range of materials.


I included background papers that I created myself. I usually make a few of these before I start a painting to loosen up, so I have plenty to choose from. I also used scraps and bits of other work and canvases that I've cut up to re use in other projects.


Magazine pages were also used. Images of textures and numbers. I also incorporated natural elements and some ephemera. An old key also found its way into my take on the calender.


Here you can see for #19 (above) I used one of my mixed media paintings on a stretched canvas and covered a section of it with a piece of loose canvas onto which I painted a realistic shell on some sand. The number 19 was traced onto a piece of tracing paper and taped on. I photographed it and then disassembled the whole thing.


Here is one of the set ups I used for #20 using one of my journals open to a painted page with the elements placed in a pleasing manner. I only used the right side of the shot for the final image.


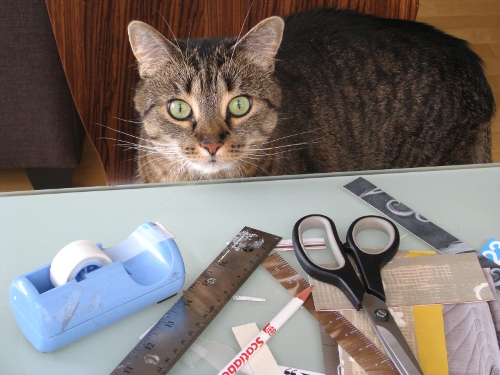
Of course it's always nice to have a studio helper to get the work done. Working on "the week as art" was a very enjoyable experience and I'm thinking there might be a book in my future.

Check out Create Mixed Media as it's a great resource for all things mixed media. You can see the full seven days of the calender here.

Thursday, July 14, 2011

Playing Around with Mixed Media


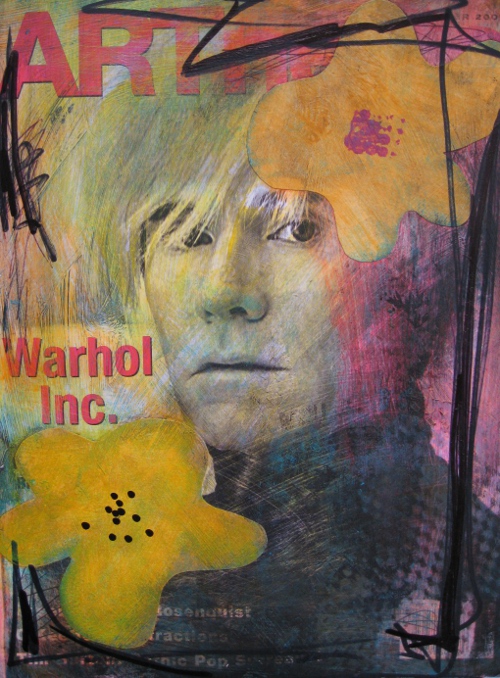
I've been playing around with some mixed media lately and making altered pages for fun. (taking a short break from my larger paintings.)  I thought I'd share with you how I made this altered mixed media page. 

First I assembled a bunch of pages torn from various magazines. As I'm a big fan of Andy Warhol I ended up using the cover of Artnews magazine and altered it. As this is a magazine cover and due to copyright laws, this page is for my personal use only. 


I begin by distressing the page in areas with a sanding block. This takes away some of the sheen in areas and gives it a nice rough finish ready to take the acrylic paint and medium.


I applied random areas of color keeping them bright and clean. After all I want to capture the essence of Warhol in the altered page.


I cut out poppy shapes from some background papers that I created earlier and glued them down with matte medium. Then I gave the whole page a coat of the same medium. When the page had dried I added some free form lines with a black Sharpie marker.


I finished the page by adding some texture with stamping. I used a piece of rubber shelf liner. I also used my sanding block again and sanded off paint in a few places. Finally, I added a few "seeds" in the bottom poppy with my black marker. I then coated the whole page with a coat of my acrylic matte medium.

Taking a break from whatever it is that you do is a great way to relieve stress (remember cutting and pasting and painting in grade school?) Even those that claim they can't even draw a straight line or stick figures can enjoy the freedom of this type of creative outlet.

Friday, April 2, 2010

DIY Before and After


Here is my kitchen before. All white and boring. I've been wanting to do something with our back splash for the longest time. Ideally, I'd love to install a beautiful glass back splash but as we're renting I wanted an easy (and fast) solution, so I decided to paint. Nothing says spring to me like a good DIY.

Here is my kitchen after. I chose this bright fresh shade of lime green. As it turns out bright lime green (Pantone 14-0244) is my color according to Colorstrology by Pantone. Want to know what color your birthday is? Click here.

I'm very happy with how it looks now and it only took a couple of hours to do. And an added bonus, I got the paint at a great discount as it was a mis-tint. My local paint store always marks down their cans of mis-tints and even organizes them by type and color. It's a great way to pick up some quality paint at a great price for your craft or DIY projects. Now, I'm going to sit and enjoy my new kitchen. Hmmmmmm, this color is making me crave a margarita.

Do you have any DIY's your going to tackle this spring??

Wednesday, July 15, 2009

Acrylic Painting Demo-Steps 7-8

Step 7. Add another layer of paint to the sky area, blending edges with a damp paper towel. Add some highlights to the water. When this is dry add some very thinned out burnt umber and dark green to the water in sections to resemble shadows in the water.
Step 8. Let your painting dry thoroughly. Have a good look at it and add highlights where you think they should go. Here, I've lightened the grassy area in the center and added highlights on the grassy sections in the front.
detail

See the details in the grass and water. You can really see the texture of the canvas and some of the red oxide coming through the green.
Completed Painting

So here's the finished painting. I hope you've enjoyed this little demo. If you've purchased a painting from me at an art fair or show and asked me how I get that "fuzzy" look and I tried to explain it to you, now I've shown you. It's easier to get when visuals are provided. If you paint and are going to try this technique, I hope I've explained it well enough. Please feel free to share what you've come up with. Don't be shy. Leave a comment and a link if you have one. Show us what you've done.

Acrylic Painting Demo Steps 1-6

Step 1. Start by painting your canvas (mine is textured) with a thin coat of a warm color. I usually use red oxide thinned with a little water and gloss medium. If you wish, you can extend the paint to cover the sides of your canvas. This finishes the edges nicely which is important if your painting will be displayed unframed.
Step 2. Plan your painting. Sketch and paint in the dark areas. Here I've used Liquitex burnt umber and hooker's green deep.
Step 3. Paint in the sky and creek area with a color of your choice. I wanted a fairly simple sky so I've used white with a little yellow ochre and phthalo blue. I allow the sky color to touch up to the edges of the darker color blending the areas with a damp paper towel.
Step 4. When this is dry I go over the edges of the trees with burnt umber and a little medium. I have very little paint on the brush and scummble on the paint. See detail below.
Step 5. I've added burnt umber to some of the areas of the bottom to represent darker patches of grass. I've also added another layer of color to the sky. This time I've used unbleached titanium applying the paint lightly over the burnt umber of the trees and and blending with a damp paper towel.
detail

Step 6. Mix up some greens to use. I've mixed up a dark, a middle and a light green. Add your dark green first, in sections where you want the grass to show some darks. Let some of the orange under painting show through in areas. This is a nice effect and I think makes the grass look more natural. Let this layer dry completely, then add the medium tone of green in sections. Let it dry and then do the same with the lightest green, where you feel the grass should be lighter. Repeat these steps twice to give the grassy areas depth. Also, brush over the light area of the creek with some of the darker green and burnt umber. Wipe away in the direction the water would flow. This is where you can really see the texture on you canvas, if you've used it.

Tuesday, July 14, 2009

A painting Demo Part One

Very well worn brushes

preparing the canvas

Stage 1 preliminary painting in

I've gotten many requests into showing a bit of a painting demo as to how I achieve my "soft focus" effect in my paintings. If you're a regular to my blog you may remember this post from last year where I showed you one painting from start to finish. I find demos awkward to write up as much of how I paint is intuitive and when I get "in the zone" I find it hard to stop and take photos. I think demos are best done in person when you can actually see the demonstrator doing their thing. I've always loved the idea of doing workshops at a beautiful resort-hhmmmm, perhaps that's in my future at some point?

I generally start with a pre-primed canvas and paint it with a warm base coat, usually red oxide. Then I "sketch" in the darks with thinned acrylic paint and one of my favorite "scraggy" brushes. To achieve my soft focus effect the most important thing for me is having the right brush. I buy very inexpensive brushes and wear them in until I get them just right. The more uneven the edges become the better they are for softening the edges. A combination of dry brushing and many layers of coloralso helps to soften the edges.

Stay tuned for the rest of this demo. I'm in studio this week working on new paintings for this upcoming show and I've got my camera right by my side, ready to shoot as I paint.

Friday, May 1, 2009

Hands On Show This Weekend

Mood Indigo, 8x10, Acrylic on Canvas

Lily of the Valley, 8x10, Acrylic on Canvas

Morning Glory, 8x10, Acrylic on Canvas

It's been a crazy busy week so just a quick post today. You may remember I'm participating in Hands On: Artists and Artisans, here in Toronto this weekend. I wrote about it here. If you're in the area please stop in. Lot's of wonderful art and high end craft, just in time for Mother's Day!! I've got plenty of smaller art available as well as a display of larger paintings for your home or office. It's spring (yay!!!) a great time to refresh and redecorate-with art of course!

I've received quite a few emails about how I paint, my technique for getting that soft focus effect. I'm in the midst of preparing a little demo of how I do that, as well as working on smalls and new daily paintings to list in my shop. So please stay tuned.

Whatever your plans are for the weekend I hope you have a great one.

Thursday, November 27, 2008

Work in Progress

To all my friends celebrating Thanksgiving, Enjoy!! Enjoy your family and friends and food.

I've been busy in the studio finishing up paintings and making deliveries. There are two events happening next week that I'm a part of and I'll post about them shortly. I mentioned earlier that I've been doing something really creative for the past two Saturdays. Well I've been attending a collage workshop at C1 Art Space here in Toronto. The class is being taught by Sandra Tarantino. A wonderful artist who has a show going on right now (ends Nov. 29th) at XeXE Gallery. We've been working mostly with photo transfer techniques and this Saturday we are doing a little bit of encaustic. The class has been a great experience and it has been a nice change working with other people around doing the same work. Ive been enjoying it so much that I've even been considering teaching workshops myself in some capacity.

A special thank you to the bloggers that have mentioned my etsy shop and have referenced paintings in their posts. It's wonderful getting to meet so many new friends here and I'm starting to feel that I can actually do this blogging thing!! And thanks to those of you that have emailed me with special orders and commissions. I am painting away and they will be done in time for Christmas. That's it for now-I've got to get back to my easel!!!

Friday, October 17, 2008

October Giveaway!!

Here is the original one of a kind art card that one of you will win in my October giveaway. You still have a chance to enter as the contest closes this Tuesday, October 21st at midnight. Just leave me a comment on any of my blog posts from October 7th-21st.

The card is an original acrylic painting on canvas, mounted onto a 5x7 Strathmore watercolor card. I've collaged a dragonfly cut from watercolor paper that I've painted myself and the card is blank inside. You can also frame it and hang or display it as art instead of using it as a card. So come on, start commenting and I'll announce the lucky winner next Friday. Have a great weekend everyone!!

Tuesday, September 23, 2008

New Work


These are my two newest small paintings. They are each 6x6, mixed media on panel and will be available for purchase in my shop on Wednesday September 24th, 6 p.m. est.

I've been busy today finishing up many of the small mixed media paintings that I started awhile ago. I think I have about 24 in various stages. I'm really excited about them as I've been trying new techniques and have been very happy in the results. I'll be sharing them with you as I finish and would love to get your opinion.